
How to Travel with Your Dog to Europe
Turns out, if you want to travel with your dog to Europe, it’s not as easy as showing up at the airport with your furry friend on the day of your flight. It’s actually a little (or a lot) more complicated than that.
We dove into this process during our recent move to Prague, as we were bringing our dog, Ellie, with us. We arrived in Prague on June 7 and will be living here, with Ellie, for the next year on Youth Mobility Visas.
So how do you travel with your dog to Europe? Allow me to try and break it down for you! And don’t miss my tips for flying with a dog at the end of this post.
Note: This is all based on personal experience bringing our dog, Ellie, from Vancouver, Canada to Paris and then onto Prague in the spring/summer of 2019. If you are bringing your own pet abroad, I do strongly suggest you consult the appropriate government agencies to get the most up to date information. Here’s the Canada info and the EU info.

A word on service/support animals:
The below info is based on the process for bringing a pet with you to Europe – this does not include service or support animals. If you are bringing a service or support animal, I would strongly suggest you check what rules you need to follow, as they’re likely different. Also note that not all airlines recognize support animals. And it is also strongly advised that you do not fabricate support animal certification just to try and fly your pet for free or to bring a larger animal on board. This makes the process a lot harder for people who genuinely need support animals.
A word on when you should travel with your dog to Europe:
Travel is tough on everyone, especially pets. And air travel, for dogs who don’t travel by plane frequently, is stressful. Besides the stresses of the plane, most dogs also have a hard time adjusting to new places, new routines and new timezones. As much as you would love to take a photo of your dog with the Eiffel Tower to post on Instagram, please do not travel with your dog to Europe if you’re going on a short trip where you’ll be bouncing around constantly. It’s unfair to your pet.
Yes, they might miss you (and you’ll definitely miss them) if they stay home with a pet sitter. But they’ll be much better off at home where they’re comfortable and can stick to their routine rather than being carted on and off planes and trains through different cities for a few weeks. And if you bring them, you’ll then have the added burden of needing to find pet-friendly transport, accomodations and activities. But you’re not going to pass up seeing the Colosseum while in Rome, which means your fur baby will be stuck in a hotel room all day. How fair is that?
I would only ever bring a pet abroad if I were moving somewhere for a long period of time (6+ months) and planning to stay in one place. As much as your pet loves spending time with you and you with them, their happiness and comfort should come first.
Okay, let’s get into how to travel with your dog to Europe (specifically from Canada).

Before you start: Research!
Before you begin the process of trying to travel with your dog to Europe, I suggest you do some research. Consult the government agency you’ll be going through from home, as well as the rules for your specific European country. There are also lots of great pet travel websites, like Travelnuity and Bring Fido. Do not rely on your vet to know exactly what paperwork or shots you need, as they aren’t experts in international pet travel.
Step 1: Where are you going?
Europe is huge and while some of the rules apply across the board, not all of them do. The big exceptions are: the United Kingdom, Ireland, Malta and Finland. These four countries require an extra step at the vet. As well, the UK and Ireland (unsure about Malta and Finland) do not allow animals to arrive in cabin. That means that even if your dog is small enough to fit under the seat in front of you, they cannot enter the UK/Ireland this way. That also means if you’re flying to somewhere else in Europe with your pet in cabin, your flight cannot connect in these countries.
Note: As far as I know, it’s next to impossible to bring an animal to Iceland (in cabin or in cargo). So if you’re hoping to go traveling around Iceland with your furry friend, you might want to think again. This also rules out any connections in Iceland.
Which is how we found ourselves paying way too much money for direct flights to Paris in June, since all of the cheap flights had connections in London or Reyjkavik.
Step 2: When are you going?
Hopefully you’ve started this process nice and early as there are some things you’ll need to take care of well in advance of your trip (and some stuff you won’t be able to do until right before you go, but more on that later). I would suggest looking into this process at least three months before your travel date.
As well, if you’re flying your dog as cargo, you may need to avoid certain travel times. Many airlines won’t carry pets in cargo during the summer months as the cargo area gets too hot.
At this point, you don’t have to have your exact flight booked, but you should know roughly when you’re going to be heading to Europe.

Step 3: Double-check that you qualify for non-commercial movement
The rules laid out here are for the non-commerical movement of pets to Europe. This means your dog must:
- Travel with you or five days before/after you
- Remain in your posession. You can’t be travelling to sell the dog or give it to a new owner.
- Be one of no more than five pets, unless travelling for a competition
Assuming that you qualify, you can proceed with these steps. If you don’t qualify, you will need to get a commercial certificate for your dog and follow other rules.
Step 4: Microchip
Your dog needs an identification number (microchip) in order to enter the EU. A tatoo also works, but only if given before July 3, 2011. Ensure the microchip can be read by the EU readers (it should comply with the ISO standard 11784). If it can’t be, you’re responsible for bringing along your own reader.
If your dog is already microchipped, you won’t have to worry about this step. But as microchips aren’t required in Canada, not all dogs are. Ellie was not. Luckily, it was a very easy process. She got a quick needle near her neck and only let out one little yelp in pain. And then it was over!
Once given the microchip, your vet will give you the documents with the microchip number and information to register. I believe the registration was another $20 or so but was easy to do online. At this point, you really want to be holding onto all of your paperwork so don’t lose that microchip number.
You can do the micrcochipping at any time, but at least 21 days before travel (we’ll discuss why below). I would suggest going at least a month in advance to be safe. We did ours mid-March for a June 1 departure.
Step 5: Rabies vaccine
Most dogs are already vaccinated against rabies. However, the EU has a fun little rule. If your dog hasn’t been microchipped yet, their rabies vaccines don’t count. So even though Ellie had an up to date rabies vaccination, she didn’t have a microchip so she needed a new vaccine.
Important: The microchip must be done before the rabies vaccination! You can do them on the same day, but the microchip must be done first.
If you are doing both on the same day, you might be wondering how they’ll know which one was done first. Since this rabies vaccine will be counted as your dog’s first (because pre-microchip rabies vaccines don’t count), there is a 21 day wait period before the first vaccine is active. Therefore, when filling out the paperwork (more on that later), you’ll write the activation date as 21 days after the vaccine was given.
If your dog already had a microchip, you just need a valid rabies vaccination. You may already have one, but ensure that the rabies certificate you have has your dog’s micrcohip number on it (and was given post-microchipping). Note that booster vaccines do not have a 21 day wait to be active; they are active right away since your dog was already vaccinated.
You must get your rabies vaccination, if it’s a “first” one (or first one following a new microchip), at least 21 days before travelling, so that the vaccine is active by the time you arrive. If you’re getting a booster (your dog was previously microchipped and had a rabies vaccine post-microchip), it can be given at anytime. But if the booster is within 21 days of travel, you’ll need to bring records of the booster and the original to prove you had one before the 21 days.
All that to say, I would go for your rabies vaccine at least a month before travel to be safe.
Note: This is for dogs that are 12 weeks or older. If your dog is under 12 weeks, consult the gov site for specific instructions.
Step 6: Make travel arrangements
If you haven’t yet, book your flights and figure out how you will actually travel with your dog to Europe. We were lucky that Ellie is small enough to fit under the seat and therefore can fly in cabin. If you’re hoping to do the same, go on your airline’s website and figure out the size and weight maximums for carriers. You’ll also want to see if your airline has any restrictions on breeds.
Keep in mind that dogs can’t fly in cabin to Ireland, the UK or Iceland!
If your dog can go in cabin, you’ll then want to book them a ticket. Airlines handle this differently; some allow you to add your animal while you’re buying your tickets and others make you do it later. We flew with Air Transat, and their method had us calling in after we booked our own tickets to then book one for Ellie. However, we were told we wouldn’t get an email confirmation with her ticket until 14 days before our flight. Needless to say, this was a little concerning. Luckily, we did get that confirmation mid-May but I have no idea why they couldn’t send me a confirmation, or at least a receipt for payment, when I actually booked.
It cost $90 to take Ellie with us in cabin. She also counted as one of our carry-ons, meaning whoever took her would only be able to bring a personal item and no carry-on.
Most airlines will only allow so many pets on board per flight so you’ll want to make sure you book your pet as soon as possible. If you’re putting your pet in cargo, you’ll need to find out how your airline deals with this. Note: it will be way more than $90 to travel with your dog to Europe in cargo.
You’ll need your exact travel dates/flight info for the next step of the process.

Step 7: Book an appointment with the CFIA
You now need to book an appointment with the CFIA: Canadian Food Inspection Agency. If you’re in Vancouver, the closest office is Burnaby (there’s also one in Surrey but way down in almost White Rock territory).
Now this is where your timing comes in. You need to visit your vet first, and then the CFIA, both within 10 days of when you arrive in Europe. While you do need to visit your vet first, I suggest booking with the CFIA first as they do book up and you don’t want to miss out. You can simply call the office to book an appointment.
Note that the visits to your vet and the CFIA must be within the 10 days before you arrive in Europe, not when you leave. If you have connections, are flying overnight or simply moving too many timezones, you may end up arriving in Europe a day or two after you left your home country. Keep this in mind!
We left for Europe on June 1, but arrived on June 2. That meant we had from May 22 to go to our appointments. We went to the vet on May 25 and to the CFIA office on May 27. I would recommend giving yourself a few buffer days before your flight in case you need to re-do any of your paperwork.
*Additional step if you’re travelling to Malta, Finland, Ireland or the UK:
If you are travelling to any of these countries, there’s a fun extra step you get to take. Your dog requires an Echinococcus (tapeworm) treatment. And here’s the kicker: the treatment must be given not more than 120 hours and not less than 24 hours before your arrival in Europe. That means that instead of having 10 days to see your vet and the CFIA, you now only have 4 days to see your vet, get the treatment, and go to the CFIA.
Also note that this treatment is needed anytime a pet is entering these countries, even from within Europe. So, for example, if you’re moving your dog with you to London and decide you want to bring them to Paris for the weekend, you’ll need to do an Echinococcus treatment before re-entering the UK and within that same strict timeline (not more than 120 hour and not less than 24 hours). So that means finding a vet in Paris. You’ll also need to find a fun way to get there as dogs aren’t allowed in-cabin on UK planes nor are they allowed on the convenient Chunnel that connects London and Paris. (Can you start to see why Colin and I didn’t want to bring Ellie to the UK?)
Step 8: Book an appointment with your vet
Now that you have your appointment with the CFIA, you can work backwards and book something with your vet. Remember that this vet appointment must be within the 10 days of your arrival in Europe (or 5 if you’re going to Malta/Finland/Ireland/UK).
For this appointment, you’ll need the vet to do a general health check and then fill out the “Health Certificate for the non-commercial movement into the EU from Canada of dogs, cats and ferrets.” Let your vet know what you need from them ahead of time, as some vets will charge extra for filling out your paperwork. This is also a good time to pick up any anxiety medication if you need it for your flight, and to do the Echinococcus tapeworm treatment if you need it.

Step 9: Ready your Health Certificate
I’m not going to to lie to you. The Health Certificate is kind of ridiculous. There’s a lot to fill out and most of it is incredibly confusing or non-sensical. There are instructions on the gov website but even they aren’t the most helpful. I ended up calling the CFIA and they very efficiently talked me through the whole thing. So now, I’ll do the same for you!
You need to fill this out in blue ink. I would suggest filling it out before you get to your vet, and only leaving the section you need them to sign/fill out blank. In my experience, vets won’t know how to fill this out on their own and if you’re paying for their time, you don’t want to wait for them to figure it out. We filled out a copy, and then also brought a blank copy in case our vet wanted to write it herself. Luckily, she was more than happy to sign our completed copy.
Which Health Certificate do you get? Good question! There are a number of them linked on the CFIA website. You’ll need to use one in the language of your port of arrival in Europe – which may not necessarily be your destination. For example, we flew into Paris but were moving to Prague. But because Paris was our port of entry in the EU, we used the French Health Certificate. Make sure you use the right one or else you’ll have to start all over again!
Note that there will be lots of crossed out sections on the form that you don’t have to worry about. There are also some sections that you’ll leave blank that the CFIA will fill in.
Here’s how you fill it out:
- 1.1: Your name and address in Canada
- 1.5: Your name (same name as 1.1) and address in the EU
- 1.18: “Dog”
- 1.20: How many pets you’re bringing
- 1.25: Check the box next to “pets”
- 1.28:
- You must write the species name in Latin (I told you these forms were nonsense). So dog is “Canis lupus familiaris.”
- Sex is indicated with M or F.
- Do not abbreviate the colour (e.g. write out “brown” not “brn”).
- Same with breed; do not abbreviate.
- The identification number is the microchip number. Identification system is “microchip.”
- And DOB is straight forward.
- On page 2, all you need to do is cross out the options that don’t apply to you. So wherever it says either/or and there’s a little one in superscript, you’ll need to select one by crossing out the options that don’t apply.
- Page 3: Continue crossing off options in the top half.
- On the chart in the middle of page 3 is where you’ll be putting your rabies vaccine info.
- Alphanumeric code of the animal is their microchip number. Since you likely won’t be able to squeeze the whole number into one line, I used two lines and it worked fine.
- Date of implantation: When the rabies vaccine was administered
- Name and manufacturer: This should be on your rabies form. For example, ours was Defensor3.
- Batch number: This should also be on the form. Ours didn’t say batch number, but we put down the serial number and that seemed to work.
- Validity of vaccine from: This is where you would put the activation date of the rabies vaccine. So if this is a first vaccine (or first after a microchip), the validity from date would be 21 days after implantation. If this is a booster, the validity from date is the same as the implantation date.
- Validity of vaccine to: The expiry of the vaccine should also be listed on the rabies form.
- Date of blood sampling: You likely didn’t have to do blood sampling, so can write “n/a” in this field.
- Page 4: You only need to fill out this page if you had to get an Echinococcus treatment.
- Page 5: Nothing to fill out!
- Official veterinarian section on page 6: This is where your vet fills in their information. Remind them to do it in blue ink (or better yet, bring the blue ink pen you used to fill out the rest of the form). Ensure that they fill out every section, most importantly the date, stamp and signature. You also must ensure they write “veterinarian” in the qualification and title section.
- Endorsement by competent authority on page 6: The CFIA fills out this section.
- Official at travellers’ point of entry: As it states, this will be filled out by the officials receiving your pet at your destination in Europe.
- Page 7 – I, the undersigned: Sign and print your name here
- Page 7 – transponder/tatoo: Put your dog’s microchip number
- Page 7 – [the owner]: Print your name next to this and cross the lines below if you are the one transporting your dog.
- Page 7 – place and date: Write the date and city where your CFIA is located. You will also sign under this. If you’re unsure of the date or city, you can wait until you get to the CFIA office.
Phew! I know, it’s a lot. Try your best to get through it. The most important thing is that you have your vet’s signature and vaccine information done correctly. If you’re missing any of your own signatures or you’ve forgotten to cross things out, they can help you with that at the CFIA office.

Step 10: Go to your vet appointment
This is the appointment, within 10 days of your arrival, where you’ll be getting your vet to fill out their part of the Health Certificate. Make sure you’re clear on the rules and what you need from them, as you wouldn’t want to have to go back to the vet if the forms are done wrong. You should also bring your microchip registration (with the number) and rabies vaccine form, as well as your ticket or proof that your pet is travelling with you on the date you say they are.
Our vet office was super kind and accomodating, but they weren’t very experienced in the Health Certificate. They didn’t know they had to sign it, and were planning to send us off with just a paper saying Ellie was in good health. This would not have been adequate to bring her to Europe. They also were under the impression that we needed the Echinococcus treatment, which I knew we did not for arriving in Paris and travelling to Prague. And even if we did need it, we couldn’t have done it then as we weren’t within the right timeframe.
Step 11: Go to your CFIA appointment
With your completed Health Certificate (bearing the signature of your vet), you can now head to your CFIA appointment. Be sure to bring your rabies vaccine form, microchip form and proof of your pet’s travel. Importantly, do not bring your dog! I know that sounds counter-intuitive, but they actually don’t allow pets in the CFIA office.
When you arrive, you’ll submit your completed Health Certificate and other forms, as well as a $20 (cash or credit) payment. You’ll then wait while the authorized CFIA vet signs and stamps your forms. Once you have all of your paperwork back and ready to go, you’re ready to fly!
Note: For ease, I would try and keep everything under one name. For example, Colin and I travelled with Ellie together, so either of us could have been named on her Health Certificate, gone to the vet or gone to the CFIA. Because I was going to the CFIA, we chose to just use my name on all of the forms. That way, there was no confusion.
You’re ready to travel with your dog to Europe. Safe travels!
Okay, you made it! You’ve done everything you need to do to be able to travel with your dog to Europe. Exhausted? Probably. It’s quite a few hoops to jump through. And even more if you have to do the Echinococcus treatment or, worse, go through a quarantine in places like Australia. If you’re going to be staying in Europe for longer than four months, you’ll also need to get your pet an EU Pet Passport, which any vet in the EU should be able to get for you. Ensure that the microchip and rabies information gets inputted into the passport.
I hope this was helpful to anyone who needs to travel with a pet abroad, and specifically if you need to travel with your dog to Europe. I know it was a lot of information, but I would have loved to have a blog post like this to work off of when we were planning our departure.
Bonus: Tips for flying with your dog in-cabin
We were very nervous for Ellie’s flight to Paris but she was such a champ! We could not have been more proud of her. We were very lucky with her and I wanted to pass along some tips we learned.
- Make sure you have all of your paperwork (above) in place, printed and ready to go. You’ll also want a printed version of your dog’s ticket or proof of travel, rabies vaccine and microchip.
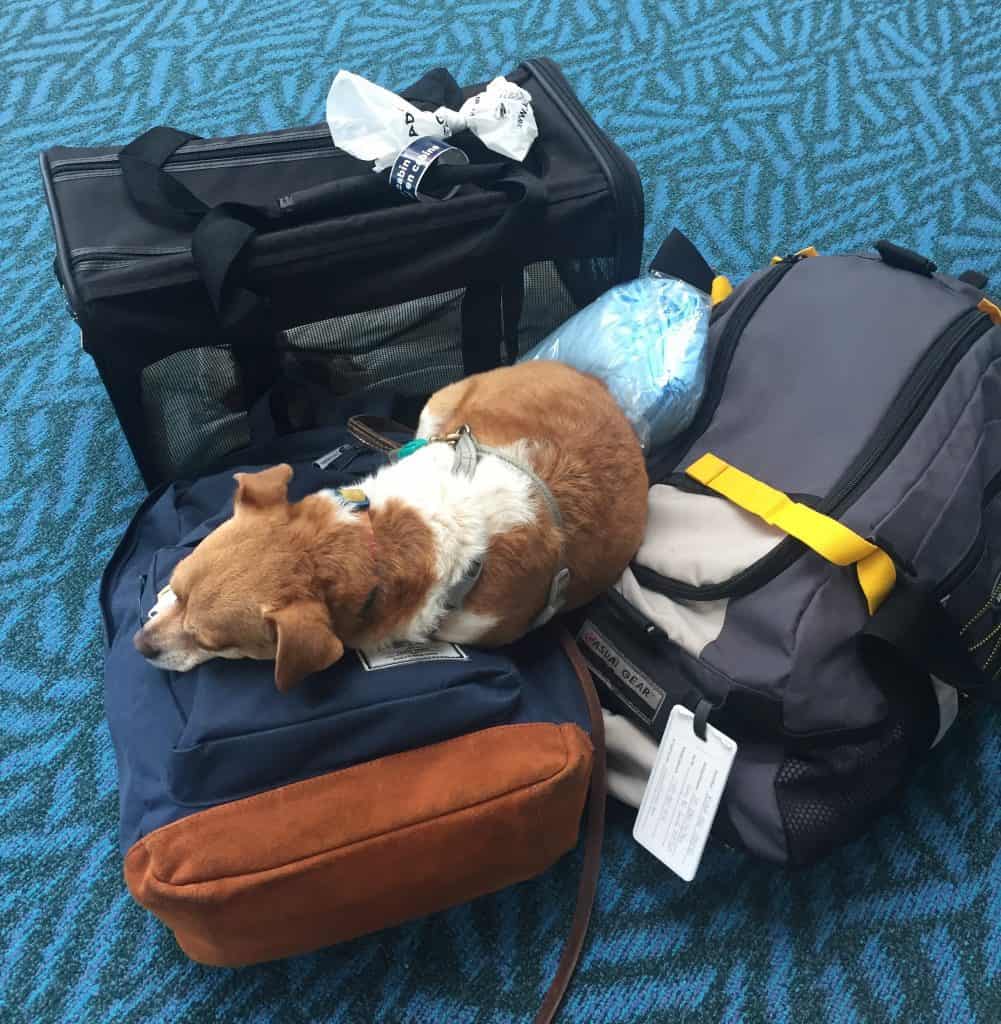
- For the flight, we packed Ellie’s bowls, anti-anxiety medication (which we gave her two hours before take-off, as per out vet’s instructions), treats, food, puppy pee pads, and her favourite stuffed monkey. We put the monkey in her carrier to comfort her, and lined the carrier with pee pads (and kept extra in our bag in case she needed them). The bowls were great so we could give her water as soon as we landed. And we wanted to have some of her food on hand, in case our baggage was lost or delayed.
- Depending on when your flight is, you’ll want to plan your walks and when to take away food and water. I read a few conflicting pieces of advice about this online. This is what we did and it worked for us: Our flight was at 2:10 PM so we fed Ellie her breakfast early around 7:45 AM and then took her out on her first walk so she could do her business. We then took her on another walk around 10:45 AM just before heading to the airport. Luckily, she was able to poop and pee on both of those walks. We took away her water before the 10:45 AM walk and didn’t feed her again after that 7:45 AM breakfast.
- Your dog doesn’t need to be in a carrier in the airport. Ellie doesn’t love her carrier and would much rather roam free, so we let her do that as long as possible. Throughout the airport, she was walking on leash or being carried by us.
- If you can, try and get through security as fast as possible. We had purchased an upgrade with our airline in order to bring more baggage, which also meant we got to fast track security and boarding. So we were able to walk Ellie through these scarier and more crowded moments easily.
- You will need to walk with your dog in your arms through the scanners at security. It can help to have another person there as you’ll need to get your bags through, take off your dog’s collar/harness/leash, and walk through. I would advise packing light and smart in your carry-on so you aren’t struggling through security. For example, put liquids and laptops in one bag, so one person can deal with that, and the other person can handle the dog.
- Do better research on the pet relief areas in your airport. We checked that YVR had a pet relief area. But turns out it is in the US Departures wing and cannot be accessed from the International Departures terminal. Ugh! We had counted on getting to the airport early so Ellie could make use of this area, but unfortunately, that wasn’t the case.
- Luckily, our flight wasn’t full so we had three seats for the two of us. Which meant we were able to bring Ellie’s carrier up off the floor and have her sit with us. She had to stay in the carrier the entire time, but it was still nice to have her with us and be able to pet her and see how she was doing. And our amazing pup didn’t cry or whine at all! She also didn’t have any accidents!
- Once we landed, we weren’t allowed to take Ellie out until we passed through Customs. We did sneak into a private family bathroom to take her out and put down some puppy pee pads, but because Ellie isn’t trained to use them, she didn’t go pee. But if your dog is used to pee pads, this is a good trick for helping them to go as soon as you land and before you can get outside.
- On the way out, I asked the agents if they needed to check anything with Ellie. They seemed a little confused but did take our paperwork and scanned her microchip. They forgot to stamp the paperwork, so I had to remind them about that. This is important as we need that stamp to prove that Ellie was processed and received in Paris. So be sure to make sure your airport officials also stamp your paperwork.
- Find that pup of yours some grass and some water, stat! Once we got Ellie’s paperwork stamped, I immediately took her out and across the street where there was a nice patch of grass for her to relieve herself on. While we did this, Colin waited for our checked baggage. We then headed back in so we could fill Ellie’s bowl with water. Once we got to our hotel and dropped off our bags, we took Ellie on a walk so she could stretch her legs and do her business.
Have you ever travelled with your dog? Tell me where you went! And if you have any recommendations for dog-friendly places in Europe that we can go with Ellie, let me know!
Make it easier for someone else travelling with a dog – Pin it!





Wow. It sure sounds complicated. I guess I got lucky when I can from Ontario Canada to Prague. (Direct flight with AC Rouge)
I went to cfia on my way to the airport. They filled in the paperwork. (Had already been to the vet days ago)
Milo flew in cabin with me ($100) and didn’t count as my carry on. His bag was in addition to mine.
He was supposed to fly in his crate the whole trip, but the flight attendants were pet friendly and allowed him to be out of the crate the entire trip.
When I arrived in prague, they didn’t care that he was with me. Didn’t check any paperwork. Tried to scan him with a tennis racket sized microchip reader. Which intimidated Milo so I pulled out my own reader. They were more impressed with my new small reader that they didn’t even write his microchip number down. They just waved us on.
That was it.
He has a EU pet passport, and has traveled with us everywhere. No issues anywhere except flying to UK. (Not allowed). Driving was no problem. Either via the ferry or the train. We were in Milo’s SUV. (Lol. I brought his Tahoe with us).
If y’all are around June 29 Canada day event in prague. Say hi. Milo will be with us as well. Cheers.
Hey Tom! Thanks for reading. Awesome that it worked out so smoothly with you and Milo. To be honest, I have a feeling we may have been able to just walk on by the officers at the Paris airport as I kind of had to remind them to check Ellie’s paperwork. We still have to get on her EU pet passport – that’s next on the list. And thanks for the invite – will hope to make it out on June 29!
Wow, this was so comprehensive, and a lot of work! You two are great dog parents doing all of this for Ellie. I hope she loves Prague!
Thanks so much, Gwen! Yes it certainly felt like a lot of steps as we were preparing. Ellie seems to be doing great in Prague. I don’t think she actually knows she’s anywhere new 🙂
Thanks for the wonderfully informative post. Makes me think this actually can be done!
You’re welcome and thank you for reading! It definitely can be done 🙂
THIS WAS A GODSEND!!!!! So thorough, and explained so simply. Thank you!
Thanks, Lydia! So glad it was helpful!
Thank you for enlighten me, travelling with my dog to Greece through Germany and I was so lost in the process but you helped me to understand tons! I hope to get everything properly done i am so nervous but after reading you I feel I got this! Hope you’re enjoying Prague.
Thanks so much, Paola! I wish you and your dog safe travels!
Any info regarding tick treatments? is it necessary to have this as well?
As far as I know, flea and tick treatments are not a requirement. However I highly recommend verifying that with an official source. Good luck with your travels!
This is a really helpful guide for dog owners planning a trip to Europe. The travel rules can be confusing, especially with microchips, rabies vaccination timing, health certificates, airline policies, and whether the dog can fly in-cabin. Preparing everything early makes the whole journey much smoother and less stressful for both the owner and the dog.
Agreed! It definitely makes sense to prepare in advance as there’s lots to do.